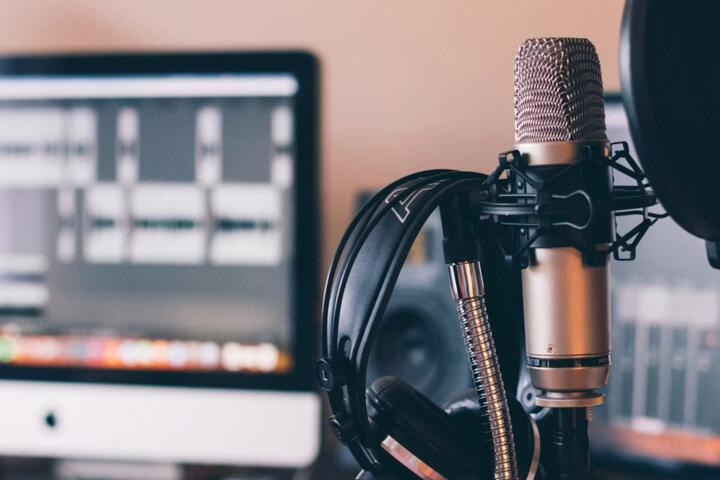
Podcast Tools: What Matters
Podcast recording and editing tools cover three jobs: capturing clean voice, fixing problems without wrecking tone, and exporting files that play well across podcast platforms. A typical setup uses a microphone and audio interface (or a USB mic), then a digital audio workstation (DAW) or editor for editing, and finally a mastering or loudness workflow for consistent volume.
For example, a solo host recording at home might use a USB microphone into a laptop, edit in Audacity or a DAW, then export an MP3 at a chosen bitrate. If you record two people in different rooms, you usually need separate audio inputs and careful synchronization, not just “better noise reduction.”
Tool choice depends on constraints: your room noise, your budget, your comfort with audio settings, and whether you record live or assemble episodes from multiple takes. I’ve seen people buy plugins first and then discover their room noise overwhelms the mic, which makes the later cleanup harder than it looks.
Problems And Pain Points
Many recording issues come from dependencies that sit upstream of editing. A noisy room, a poorly placed mic, or inconsistent gain staging creates artifacts that editing tools cannot fully reverse.
Common mistakes include recording too hot (clipping), recording too quiet (forcing heavy noise reduction), and using aggressive denoisers that smear consonants. Noise reduction can reduce steady hiss, but it often struggles with intermittent sounds like keyboard clicks or moving fan noise. If you hear “underwater” speech after cleanup, the denoiser settings are usually too strong.
Another pain point is loudness inconsistency across episodes. Podcast platforms often normalize loudness, but they still expect reasonable peak levels and a consistent loudness target. If you export with wildly different levels, listeners experience volume swings even when normalization happens.
Solutions And Advice
Recording Chain And Gain
Start with the recording chain because editing cannot recover clipped waveforms. Aim for peaks that stay below clipping; many editors show a red peak indicator, and you want headroom. If you use a USB mic, check its gain control and avoid turning it up until you hear distortion. If you use an audio interface, set input gain so normal speech peaks land comfortably under 0 dBFS.
For room noise, place the mic closer to the mouth and reduce reflections. A simple change like moving the mic 10–20 cm closer often improves signal-to-noise more than adding a plugin later. If you record on a laptop, keep the laptop fan away from the mic; I once watched a “mystery hiss” turn out to be a fan ramp around 2–3 kHz, which denoisers struggled to remove cleanly.
For monitoring, use headphones and watch levels while speaking. If you can’t hear your own voice clearly, you’ll likely overcompensate with gain and create a louder noise floor.
Editing Workflow That Holds Up
Choose an editor based on your editing style. Audacity works for many solo workflows and supports common formats, but complex multi-track sessions often push people toward a DAW. A DAW also helps when you need routing, multiple tracks, and repeatable processing chains.
Use a repeatable workflow: remove obvious mistakes first (pauses, stumbles), then clean noise, then apply EQ, then adjust loudness. If you reverse the order, you can end up boosting noise during EQ or making denoising harder after compression. In Audacity 3.4.x, for instance, the Noise Reduction effect depends on a good noise profile sample; a short sample that includes speech will contaminate the profile.
For remote recordings, keep separate tracks and avoid destructive edits early. Save a project file before major processing, then export a test version. That test export should be short—10 to 30 seconds—so you can evaluate artifacts before you process the entire episode.
Noise Reduction And EQ Limits
Noise reduction works best on consistent noise like steady hum or hiss. For intermittent sounds, consider manual edits: cut the worst segments, use clip gain, and remove obvious clicks. When you do use denoising, start mild and compare A/B playback. If the denoiser changes the “shape” of speech—especially sibilants and fast consonants—reduce the strength.
EQ can correct tone issues, but it can also amplify noise. A common approach is gentle high-pass filtering to reduce rumble, then small adjustments around the voice range. If you hear “thin” speech after filtering, the cutoff frequency may be too high. I’ve seen people set a high-pass filter at 200 Hz when their voice fundamentals sit lower, which makes the episode sound less natural.
Compression can help level speech, yet it can also bring up background noise. Use compression after you’ve cleaned the worst noise, and keep ratios moderate so breathing and room tone do not become prominent.
Loudness Targets And Export Settings
Most podcast workflows reference loudness measurement rather than raw volume. A widely used standard is ITU-R BS.1770 with loudness units (LUFS). Many creators aim around -16 LUFS for stereo programs, though platforms may normalize differently. For peak control, keep true peaks below a safe ceiling to reduce distortion after encoding.
Export settings depend on your distribution needs. MP3 is common for hosting, while WAV preserves quality for archiving. If you export MP3, choose a bitrate that matches your audience bandwidth expectations; 128 kbps can sound acceptable for some voices, while 192 kbps or 256 kbps often preserves clarity better for sibilants and music beds.
Test your export by playing it on at least two devices: a phone speaker and a wired headphone. If the voice becomes harsh on the phone, your EQ or compression may be too aggressive, and you’ll want to adjust before uploading a full episode.
Case Examples
Solo Host With Room Noise
A solo host records in a bedroom with a desk fan and a soft couch nearby. The first recordings show a steady hiss and occasional fan ramp noise. The host switches to closer mic placement, records with input gain set so peaks stay under clipping, and uses a mild noise reduction profile sampled during a quiet moment. After cleanup, the host reduces the denoiser strength and adds a gentle high-pass filter to remove low rumble.
In the second pass, the host edits out the worst fan-ramp segments instead of trying to denoise them. The episode exports at a consistent loudness level, and the host notices fewer “underwater” artifacts because the denoiser settings stay conservative.
Two Remote Guests With Sync
A producer records two remote guests using separate recording apps and saves each guest as its own audio file. The producer imports both tracks into a DAW, aligns them using visible waveform peaks around a shared intro phrase, and then trims leading and trailing silence. The producer avoids heavy denoising on the entire track and instead applies cleanup only to sections with obvious noise.
For loudness, the producer uses a measurement tool to keep speech levels consistent across both guests. The final export uses a controlled peak ceiling so that MP3 encoding does not introduce harsh clipping. The producer also keeps the original WAV files for re-mastering later, since editing decisions often change after a few episodes.
Checklist And Comparisons
Use this checklist to decide what to buy or install first. It focuses on workflow fit rather than brand preference.
| Decision Point | If You Record Solo | If You Record Remote Guests | If You Edit Heavily |
|---|---|---|---|
| Primary Editor | Simple editor or DAW for single track | DAW with multi-track alignment | DAW with repeatable processing chains |
| Noise Cleanup | Mild denoise + manual cuts | Targeted cleanup per track segment | Automation or saved presets for consistency |
| Loudness Control | Measure LUFS and set peak ceiling | Match levels across guests before mixing | Batch export with consistent settings |
| File Management | Keep WAV originals and export MP3 | Keep per-guest WAVs for re-sync | Version projects and exports |
Step-by-step checklist for a new episode workflow:
- Record a 30-second test with your normal speaking volume and check for clipping.
- Listen for steady noise and intermittent sounds; decide whether manual cuts will beat denoising.
- Set a repeatable edit order: trim silence, remove mistakes, then cleanup, then EQ/compression, then loudness measurement.
- Export a short test segment and compare on headphones and a phone speaker.
- Export the full episode using the same settings and keep the project file for later revisions.
Mistakes That Break Quality
People often chase plugins while ignoring microphone technique. A mic placed too far from the mouth forces the editor to raise the noise floor, which makes denoising more audible. Another frequent issue is recording with the wrong sample rate or bit depth and then resampling during export, which can add artifacts.
Over-processing is another trap. Heavy noise reduction plus aggressive EQ creates a “processed” sound that listeners notice quickly. If you hear pumping from compression, reduce the threshold or ratio and re-check breathing and pauses.
Some creators also export without checking peaks. Even if loudness looks fine, clipped peaks can distort after MP3 encoding. A quick true-peak check before upload prevents a lot of avoidable re-uploads.
Finally, people sometimes lose track of versions. If you overwrite your only WAV source, you cannot re-master later when you learn better settings. Save originals, keep project files, and label exports with dates (for example, “episode_12_master_2026-08-01”).
FAQ
Do I Need A DAW Or An Editor?
A DAW helps when you manage multiple tracks, remote guests, or repeatable processing chains. A simpler editor can work for single-track solo episodes where you mainly trim, cut, and apply light cleanup.
What Sample Rate Should I Record At?
Record at a consistent sample rate across your workflow and avoid unnecessary resampling. Many creators use 48 kHz for audio work, but the key is matching your recording and editing settings so exports do not require conversion.
How Much Noise Reduction Is Too Much?
Noise reduction becomes too strong when speech sounds smeared, sibilants lose clarity, or the voice sounds “underwater.” Start mild, compare A/B playback, and prefer manual cuts for intermittent noises.
What Loudness Target Should I Use?
Many podcast workflows aim around -16 LUFS for stereo speech, measured with ITU-R BS.1770 methods, while keeping peaks under a safe ceiling. Platform normalization varies, so test with your hosting provider’s guidance.
MP3 Or WAV For Upload?
Upload formats depend on your hosting provider, but MP3 is common for distribution and WAV is often used for archiving. If your host accepts MP3, choose a bitrate that preserves voice clarity and verify with a short playback test.
Author's Insight
Good podcast audio usually comes from the recording chain and gain staging, not from a single “magic” cleanup tool. Editing tools matter most when they support a repeatable workflow: conservative denoising, careful EQ/compression, and measured loudness with peak control.
When evaluating tools, I focus on what you can measure and verify: clipping indicators, waveform alignment accuracy, loudness meters, and export settings that match your distribution needs. If a tool hides those controls, you may end up guessing and redoing work.
For readers building a workflow, the fastest path to better sound often starts with mic placement, then a small set of consistent edits, then a short export test before committing to a full episode.
Key Takeaways
- Choose tools based on your workflow: single-track trimming versus multi-track remote sync.
- Prevent clipping at the source; denoisers cannot fix distorted audio.
- Use noise reduction conservatively and cut intermittent problems manually when possible.
- Measure loudness and control peaks before exporting, then test on both headphones and a phone speaker.
- Keep WAV originals and project files so you can re-master without re-recording.