Short-Form Editing Basics
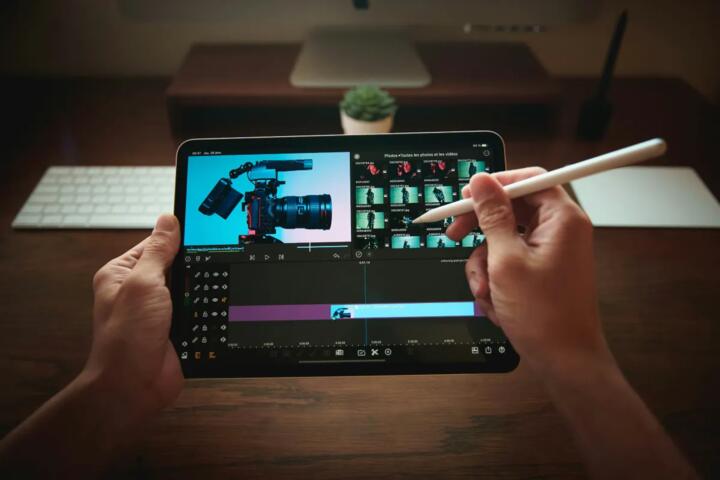
Short-form video editing focuses on fast turnaround: trimming, arranging clips, adding text overlays, and exporting in formats that play well on mobile apps. A typical workflow starts with ingesting footage, selecting the best takes, cleaning audio, then building a timeline that matches the platform’s viewing behavior. For example, many creators cut to the beat, keep shots under a few seconds, and place captions where they remain readable against changing backgrounds.
Most tools fall into a few categories: timeline editors for precise cuts, caption-first editors for speed, mobile apps for on-the-go edits, and desktop software for higher control. If you record on a phone, you often deal with variable frame rates and mixed audio levels, so the editor’s handling of codecs and audio normalization matters more than the number of effects. When you export, you also need to match common platform expectations for resolution, frame rate, and bitrate, or the app may re-encode your video and soften details.
As a practical example, a creator exporting 1080×1920 vertical video at 30 fps with a stable audio track usually avoids the “sped up” look that happens when the source has a different frame rate. That mismatch is easy to miss until you review the final file on the same device you plan to post from.
Problems And Pain Points
People often get stuck in three places: editing speed, caption readability, and export surprises. Editing speed breaks when the tool’s media import is slow, when it struggles with phone footage formats, or when it forces you into many manual steps for tasks like trimming and splitting. Caption readability breaks when text styling doesn’t adapt to motion, when the tool places captions too low, or when the font size stays constant while the background changes.
Export surprises usually come from codec and frame-rate handling. Some editors export with a variable frame rate or a codec setting that triggers heavy re-encoding on the platform side, which can reduce sharpness. Audio issues show up too: a video may look fine in the editor preview but clip or distort after export if the tool uses different loudness handling than the preview player.
Supporting technologies sit underneath these problems. Captions depend on speech-to-text models and their timing alignment; stabilization depends on motion estimation; and color tools depend on how the editor interprets camera profiles. Even the “simple” trim tool relies on accurate keyframe detection, and that can vary by codec. If you’ve ever seen a one-frame jump after trimming, that’s often a keyframe boundary issue, not your imagination.
Solutions And Advice
Pick A Workflow First
Start by choosing a workflow that matches your posting rhythm. If you edit daily, caption-first tools and mobile editors can reduce friction; if you edit weekly with more planning, a desktop timeline editor gives better control over pacing and audio. A practical target is to finish a 20–40 second video in 30–60 minutes, including captions and export, before you judge the tool. If your timeline editor takes 90 minutes for the same length video, the bottleneck is likely media import, caption timing, or export settings rather than the creative part.
On a laptop, check whether the editor supports hardware acceleration for your GPU. Many tools show this in settings, and a quick test with a 10-second clip can reveal whether playback stutters during editing. I’ve seen version 17.x of one popular desktop editor improve timeline scrubbing speed after enabling “hardware decode,” while the default setting stayed CPU-bound and felt laggy.
Use Captions With Control
Captions are where short-form videos win or lose. Look for tools that let you edit caption text, adjust timing, and choose styling that remains readable on vertical backgrounds. Automatic captions help, but you still need a correction pass for names, acronyms, and fast speech. A realistic expectation: even strong speech-to-text systems often mis-transcribe 5–15% of words on noisy recordings, so plan a brief review step.
When captions are editable, you can fix timing for emphasis. If the tool only offers a single “regenerate captions” button, you may waste time redoing the whole track. Also check whether captions export as burned-in text (part of the video) or as a separate track; burned-in captions usually work best for platforms that don’t reliably render external caption files.
Stabilize And Clean Audio
Stabilization and audio cleanup reduce viewer fatigue. For stabilization, prefer tools that offer a “crop” or “scale” option so you can trade off edge artifacts for steadier motion. For audio, look for noise reduction, compressor/limiter controls, and a way to normalize loudness. A common practical target is to keep peaks from clipping; if your waveform hits the top rail, the export may distort even if the preview seems acceptable.
Some editors include one-click “voice cleanup,” but those presets can muffle consonants. A mild frustration is when the preset sounds cleaner yet makes speech harder to understand. In that case, use a lighter noise reduction setting and rely on a compressor that targets speech dynamics rather than heavy spectral cleanup.
Export For Platform Playback
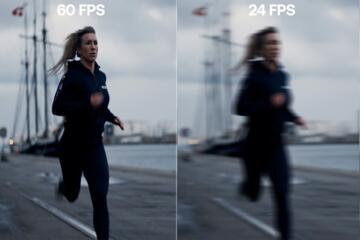
Export settings determine how the platform re-encodes your video. For vertical short-form, aim for 1080×1920 or 720×1280 depending on your quality needs, and keep the frame rate consistent with your source. If your footage is 60 fps, exporting at 60 fps preserves motion smoothness; exporting at 30 fps can look like a frame-rate conversion. Bitrate matters too: too low and you’ll see blockiness in captions and gradients.
Test exports on the same device you’ll post from. A 15-second export can reveal whether captions remain crisp and whether audio stays synced. I once compared two exports from the same timeline—one at a higher bitrate and one at a lower setting—and the lower bitrate introduced visible banding behind white text, which the editor preview didn’t show clearly.
Case Examples
Caption-Heavy Talking Video
An anonymized creator records a talking head on a phone with a quiet room and posts daily. They use a caption tool to generate text automatically, then correct names and a few misheard phrases. They keep captions centered and increase font size when the background gets busy. For export, they choose a vertical 1080×1920 preset and verify that the captions remain readable after upload by checking the posted version on mobile.
The main lesson is that caption timing edits matter more than adding effects. The creator spends about 10 minutes fixing caption timing and another 5 minutes on audio leveling, then stops chasing “perfect” visuals because the audience retention depends on clarity and pacing.
Fast Montage With Stabilization
An anonymized hobbyist builds a 30-second montage from handheld clips recorded in motion. They use stabilization on the worst segments, then trim aggressively to remove shaky lead-in frames. Audio is recorded separately or cleaned from the phone track, then leveled so the loudness stays consistent across cuts. They export a high-quality vertical file and do a quick playback check for jitter around caption boundaries.
The lesson here is that stabilization can introduce cropping and edge artifacts, so the editor’s “crop/scale” behavior becomes part of the creative decision. The hobbyist accepts slightly tighter framing rather than leaving motion uncorrected.
Comparison Checklist
| Tool Type | Best For | Watch Outs | Quick Test |
|---|---|---|---|
| Timeline Desktop Editor | Precise cuts, audio mixing, multi-track work | Import speed and codec support vary by camera | Edit a 20-second clip with captions and export; check sync |
| Caption-First Editor | Fast captioning for talking videos | Timing accuracy may need manual fixes | Generate captions, then correct 10 words; measure time |
| Mobile Editor | On-device trimming and quick posting | Export settings may be less controllable | Export 1080×1920 and compare sharpness on mobile |
| Stabilization/Audio Tools | Handheld cleanup and voice clarity | Over-processing can soften speech | Apply light settings; listen for consonant clarity |
Step-by-step checklist for choosing a tool for short-form editing:
- Confirm your source format: phone model and whether clips are 30 fps or 60 fps.
- Import 2–3 clips and verify playback without stutter.
- Generate captions and correct at least 10 words; time the correction pass.
- Apply stabilization to one shaky clip and check for edge cropping you can live with.
- Export a 15–30 second sample and review on mobile after upload.
- Lock the workflow: once it works, reuse the same export preset to avoid quality drift.
Common Mistakes To Avoid
One mistake is treating captions as a cosmetic layer. If captions are mis-timed or too small, viewers who watch without sound lose context, and retention drops. Another mistake is relying on editor preview alone; some previews use different color management or audio decoding than the exported file.
People also overuse effects. Heavy noise reduction, aggressive sharpening, or multiple compression passes can create artifacts around text and faces. If you see halos around white captions, reduce sharpening or lower the effect intensity rather than adding more contrast.
Finally, avoid mixing frame rates without checking. A 60 fps clip cut into a 30 fps timeline can cause uneven motion or audio drift depending on how the editor handles time remapping. If your timeline supports “conform frame rate,” use it consistently, or convert sources before editing.
FAQ
Which Export Settings Work Best?
Use vertical resolution that matches your target platform (commonly 1080×1920), keep the frame rate consistent with your source, and choose a bitrate high enough to keep captions crisp. Export a short test and compare after upload because platforms re-encode videos.
Do I Need Automatic Captions?
Automatic captions save time, but you still need a correction pass for names and misheard words. If you post frequently, captions with editable timing reduce rework compared with tools that only regenerate from scratch.
Why Does My Audio Clip After Export?
Clipping often comes from loudness handling differences between preview and export, or from exporting without limiting. Lower the track gain, add a limiter, and re-check the waveform on the exported file.
How Should I Handle 60 Fps Footage?
Keep the timeline and export frame rate aligned with the source when possible. If you must convert, do it intentionally and review motion on the final export to avoid a “judder” look.
What Matters More: Effects Or Pacing?
Pacing usually matters more. Tight trims, readable captions, and consistent audio levels reduce viewer drop-off more reliably than adding transitions, filters, or heavy motion effects.
Author's Insight
Short-form editing tools differ less in “effects” and more in how they handle media ingestion, caption timing, audio loudness, and export codecs. Those factors determine whether your workflow stays predictable across different phone recordings. A practical approach is to test with your own footage and measure time-to-export plus the number of manual fixes needed for captions and audio. If a tool feels fast on one sample but fails on your typical camera files, the mismatch is usually codec support or frame-rate handling rather than user skill.
When you pick a tool, treat export as part of editing, not a final step. A 15–30 second export review on the target device catches most quality issues before you commit to a full post.
Key Takeaways
- Choose a workflow that matches your posting cadence: caption-first for speed, timeline editors for control.
- Editable captions with timing adjustments reduce rework and improve readability on changing backgrounds.
- Stabilization and audio cleanup should be light enough to preserve speech clarity and avoid artifacts.
- Export settings and frame-rate consistency drive final quality; test after upload on mobile.